How To Replace a Computer Power Supply
Regardless of what we do, things are going to go wrong every now and then.
For a small business, a power supply unit failure WILL result in downtime, frustration, and lost revenue.
Sure, you could call a local PC repair tech and pay them anywhere from $50/hr to $125/hr or more to have them come out to your office or home. If you’re lucky, they’ll be able to come out and replace the power supply that day.
If not, you’re business may be impacted for days. Then there’s that thing about bringing a stranger into your home or office and keeping your data private and confidential.
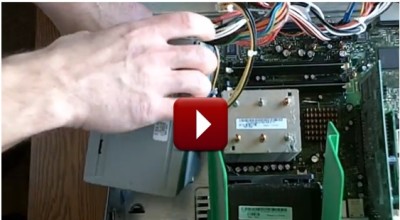
Why bother worrying about all that stuff? It’s very easy to troubleshoot and replace a desktop computer power supply, and the video above (the first in a series) will show you how.
The video was shot in 2011 and details how to replace a power supply in a Dell Dimension desktop computer. The same general method applies to most desktop computer power supplies as most are the same (one exception are the slim towers).
How did I know it was the power supply? The PC would not turn on and there were no lights or sounds from the fan. I used my handy power supply tester after opening the case by turning it on its side then pressing tabs on the top and bottom of the tower. The older style Dell desktop computers opened like this. The tower unfolds sort of like a hinge.
Most desktop computers either have a lever somewhere on the side or top to remove the side panel for access, a thumb screw, or 2 regular screws holding it on.
I made sure the PC was unplugged from AC power (important!), then unplugged the main power supply connector from the motherboard and inserted it into the power supply tester, along with the smaller power connector found near the fan/CPU.
AC power was then reapplied to the computer, and the tester’s readout was used to determine that the power supply was indeed faulty.
The tester cost about $15 online.
Don’t have one or feel like buying one? Not a problem!
Another method of ascertaining whether or not the power supply is the culprit is to simply go to a store (like Best Buy) and buy a new power supply. This can be done at a time when you are not expecting business, say, after closing. Or you can send someone else to get it.
Disconnect all the connectors from the old power supply and connect the connectors on the new one to the motherboard, hard drive, etc. Plug the new power supply into AC power and see if the PC comes on. If the computer powers up then the old PC power supply was faulty. If it doesn’t you have other problems.
If it is found that power supply is not at fault, it can always be returned.
The PC power supply is usually held in place by about 4 screws that can be accessed from the outside (on the back) of the computer.
First, open the tower. Make sure the PC is not plugged into the wall. Unplug all the power supply connectors from the main board, hard drive, CD drives, etc. Remove the screws on the outside that secure the power supply. Remove the supply from the case.
Installation is in reverse of the removal.
Stay tuned for part 2 of the video series, where we learn how to use a saw to repair a computer!
Leave a Reply